EC2 Image Builder uses image recipes to define the base image and components that make up your custom AMI. When you need to update packages, add new components, or change the base image, you create a new version of the recipe rather than editing the existing one. This ensures you maintain a versioned history of your AMI configurations.
This guide walks through creating a new recipe version, updating your pipeline to use it, and verifying the resulting AMI.
Prerequisites
- An existing EC2 Image Builder pipeline with an image recipe
- IAM permissions for EC2 Image Builder, EC2, and Systems Manager
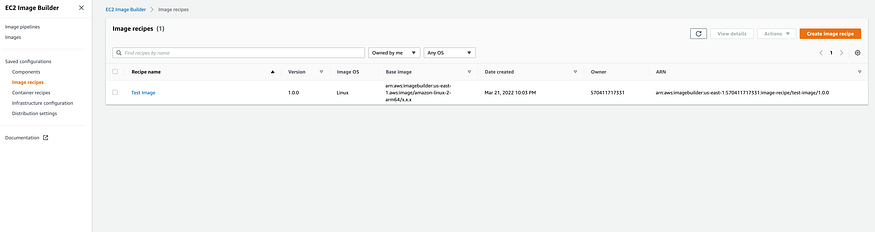
Step 1: Go to the Existing Image Recipe
Open the EC2 Image Builder console and go to Image recipes. Select the recipe you want to update.
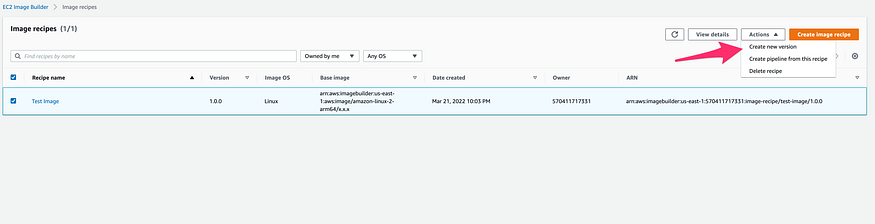
Step 2: Create a New Version
From the recipe detail page, click Create new version. This pre-fills the configuration from the existing recipe so you only need to change what’s different.
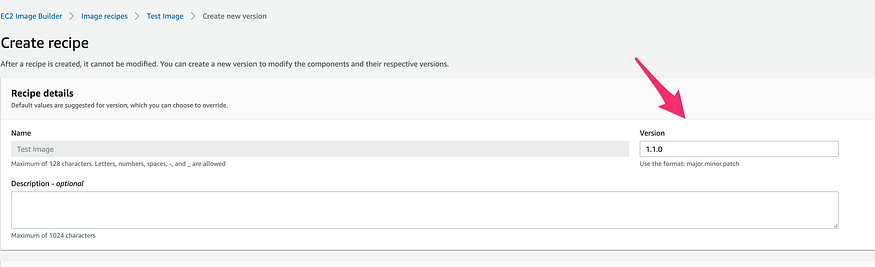
Step 3: Update the Version Number
Increment the version number following semantic versioning (e.g., 1.0.0 to 1.1.0 for minor changes, 2.0.0 for major changes).
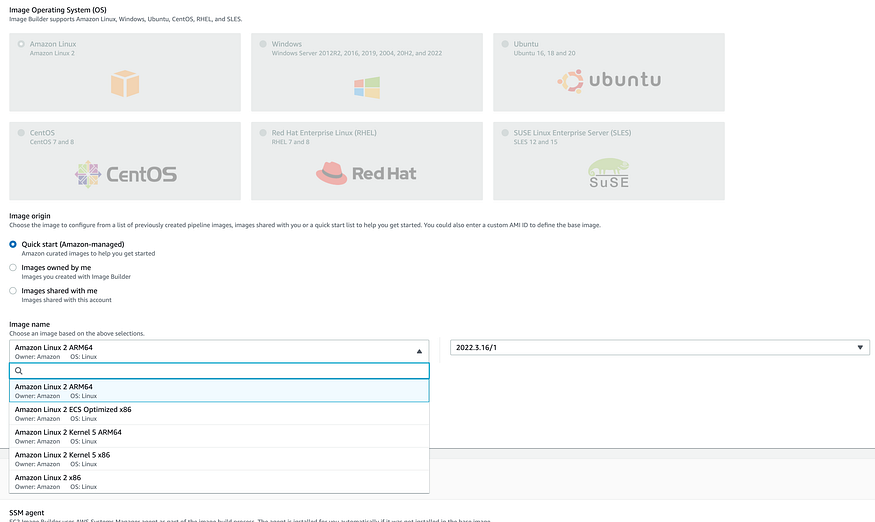
Step 4: Modify Components and Settings
Update any components, build steps, or configuration options as needed. This is where you add new packages, update security patches, or change the base image. Click Create recipe when done.
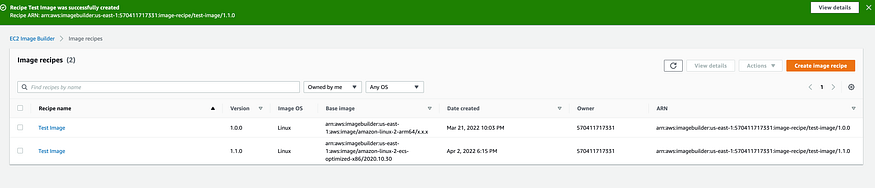
Step 5: Verify the New Recipe Version
Confirm the new version appears in the recipe list. Image Builder maintains all previous versions for rollback if needed.
Step 6: Navigate to the Image Pipeline
Go to Image pipelines and select the pipeline that uses this recipe.

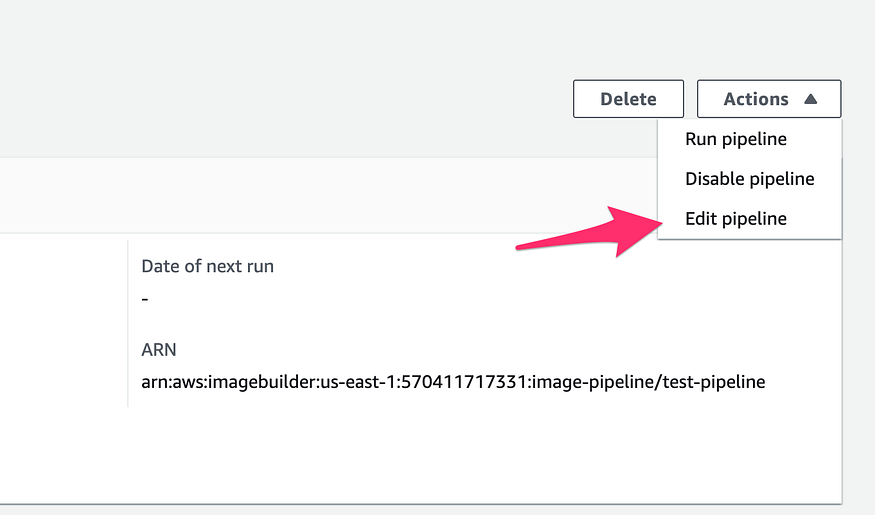
Step 7: Edit the Pipeline
Click Edit pipeline to update its configuration.
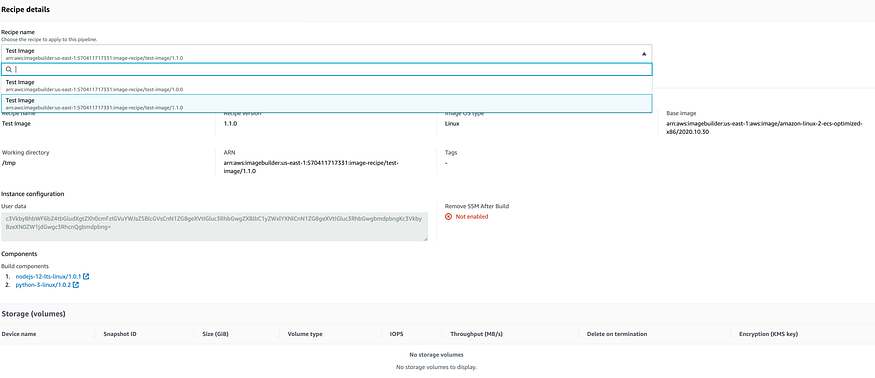
Step 8: Update the Recipe Version
In the pipeline settings, change the image recipe to the new version you just created. Save your changes.
Step 9: Run the Pipeline
Trigger a manual pipeline run to build an AMI from the updated recipe.
Step 10: Monitor the Build Instance
During the build phase, Image Builder launches a temporary EC2 instance to create the AMI. You can see this instance in the EC2 Console > Instances section.
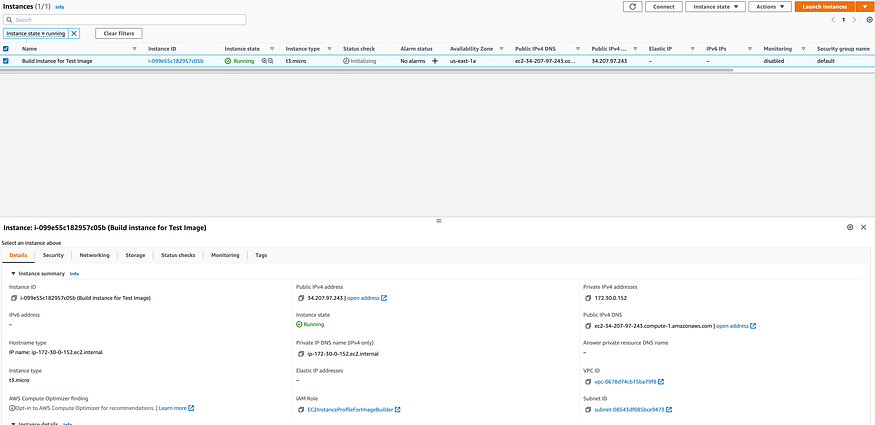
0
Step 11: Check Systems Manager Run Command
Image Builder uses AWS Systems Manager to execute build and test commands on the instance. Navigate to Systems Manager > Run Command to monitor progress.
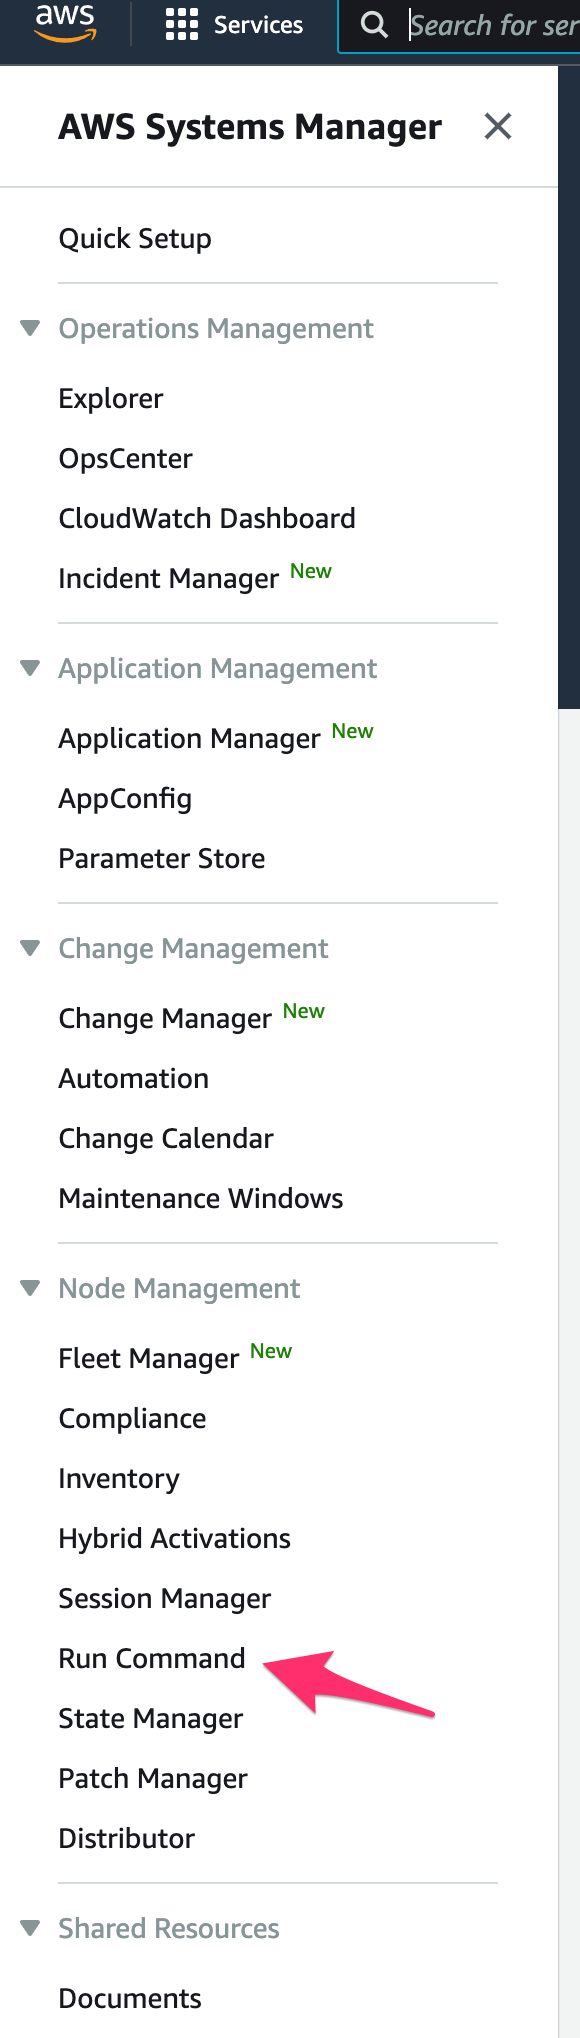
1
Step 12: Review Command History
The command history shows all commands that have been executed on the build instance, including component installations and test scripts.
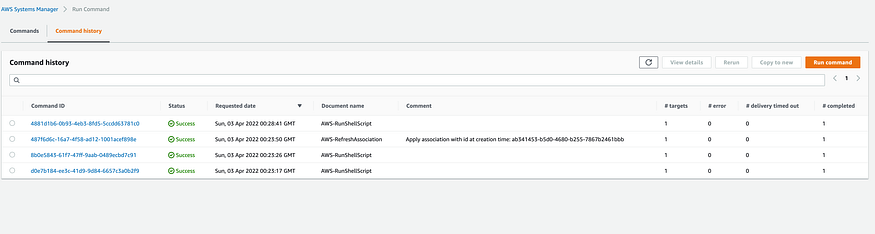
2
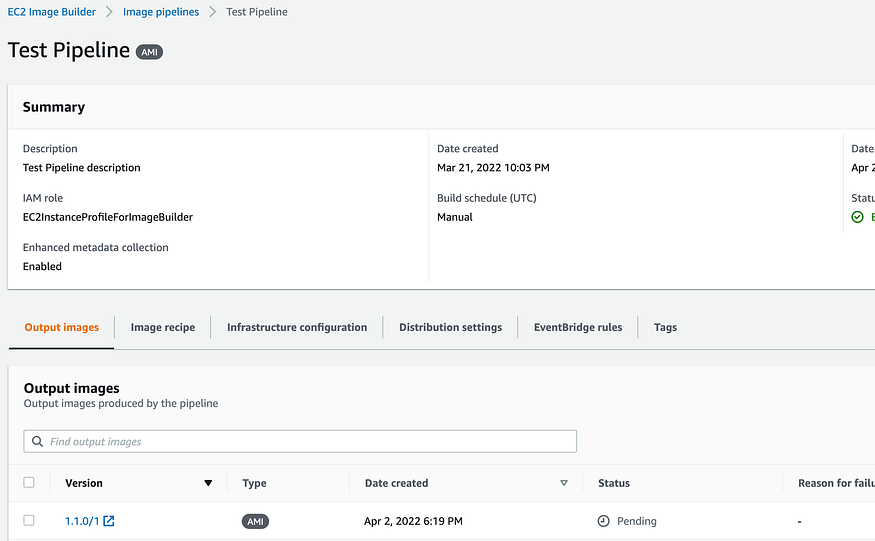
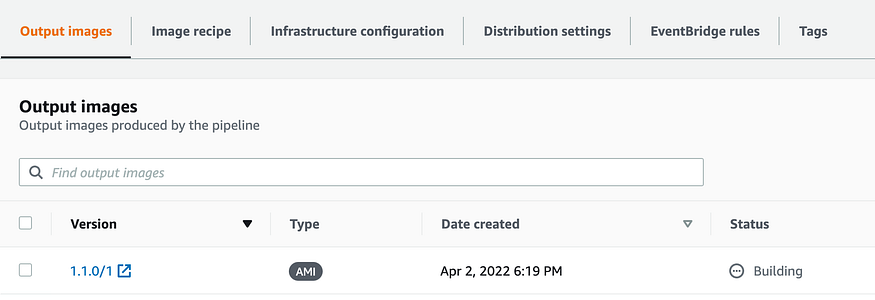
Step 13: Check the New AMI
Navigate to EC2 Console > AMIs. The new AMI will appear with a status of “Pending” during creation.
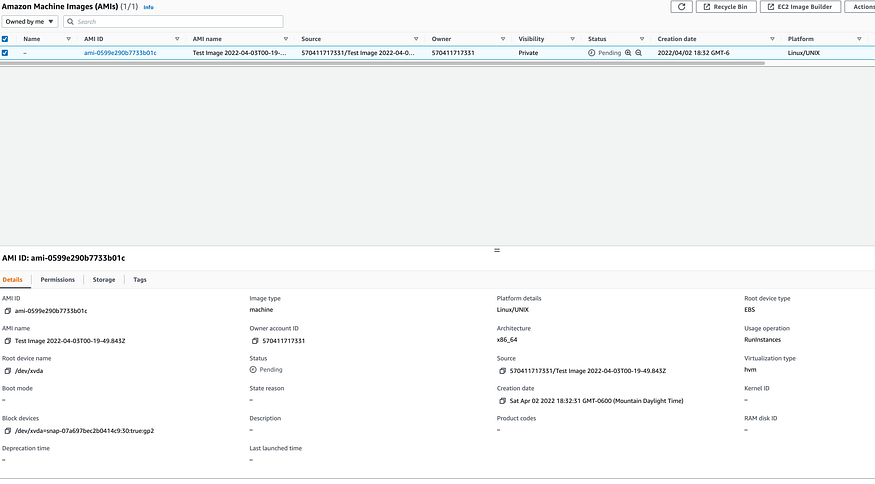
3
Step 14: Wait for the Testing Phase
Once the AMI becomes “Available”, the pipeline enters the Testing phase. Image Builder runs any test components defined in the recipe to validate the AMI.
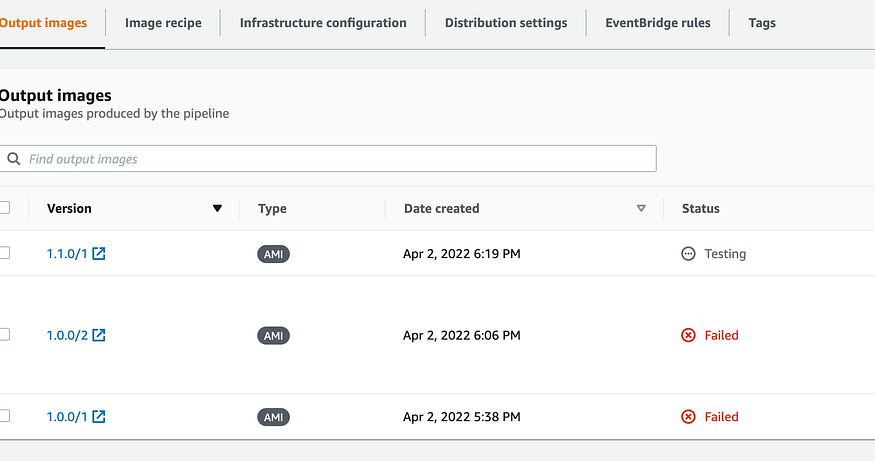

4
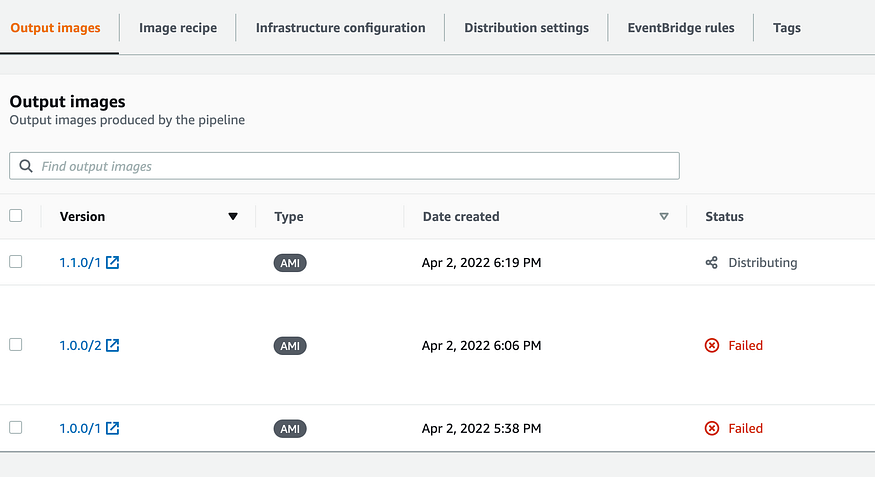
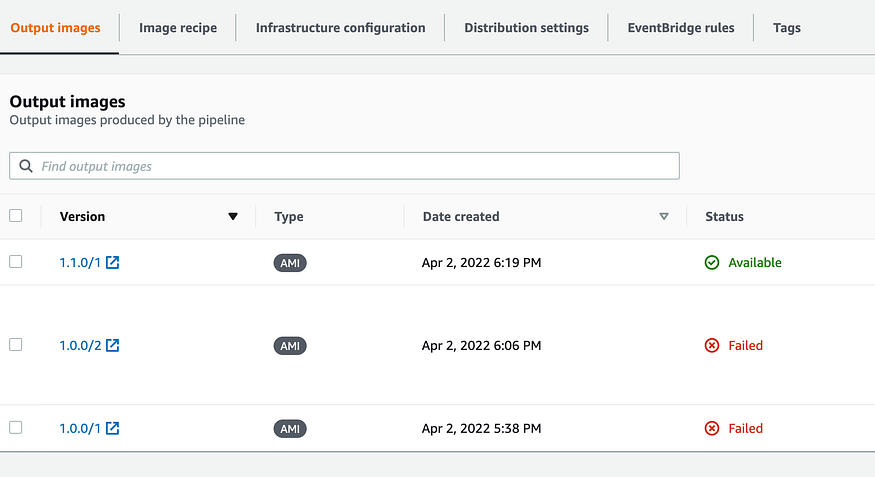
Step 15: Distribution
After testing completes successfully, the pipeline moves to the linux-distros/">Distribution phase. The AMI is distributed according to your distribution settings (target regions, shared accounts, etc.) and the pipeline status changes to “Available”.
The entire build-test-distribute cycle typically takes 20-30 minutes depending on instance type and the number of components being installed.