Atuin replaces your shell history with a searchable database: fuzzy matching, filter by directory, …
/user/kayd
@
devops
:~$
cat livestream-phone-to-aws-ivs.md
Livestream From Your Phone to AWS with IVS (and What Every Setting Means) Livestream From Your Phone to AWS with IVS (and What Every Setting Means)


Karandeep Singh
• 10 minutes
Summary
How to livestream from your phone to other devices through AWS with Amazon IVS, no server and no code, plus a plain-English explanation of every setting in the create-channel wizard and the real gotchas (RTMP auth, “Can not find channel”, why Chrome won’t play the URL).
I wanted the simplest possible way to livestream from my phone to other devices, and it turns out AWS makes it genuinely easy with Amazon IVS (Interactive Video Service), no server to run, no app to build. You point a free broadcaster app at IVS and share a playback link. Done.
But the create-channel wizard throws a dozen settings at you (channel type, latency, ingest, container format), and it’s not obvious what any of them mean. So this is the full walkthrough and a plain-English explanation of every setting, ending with a real stream from my phone.
No coding required. You need an AWS account and a free phone broadcaster app (I used Larix Broadcaster). Total time: about 15 minutes.
What Amazon IVS is
IVS is managed live streaming, built on the same technology behind Twitch. You give it video; it handles ingest, transcoding, and global delivery, and hands you a playback URL. It comes in two flavours: Low-latency streaming (broadcast to an audience, what we’re using) and Real-time streaming (WebRTC, sub-second, for interactive/two-way).
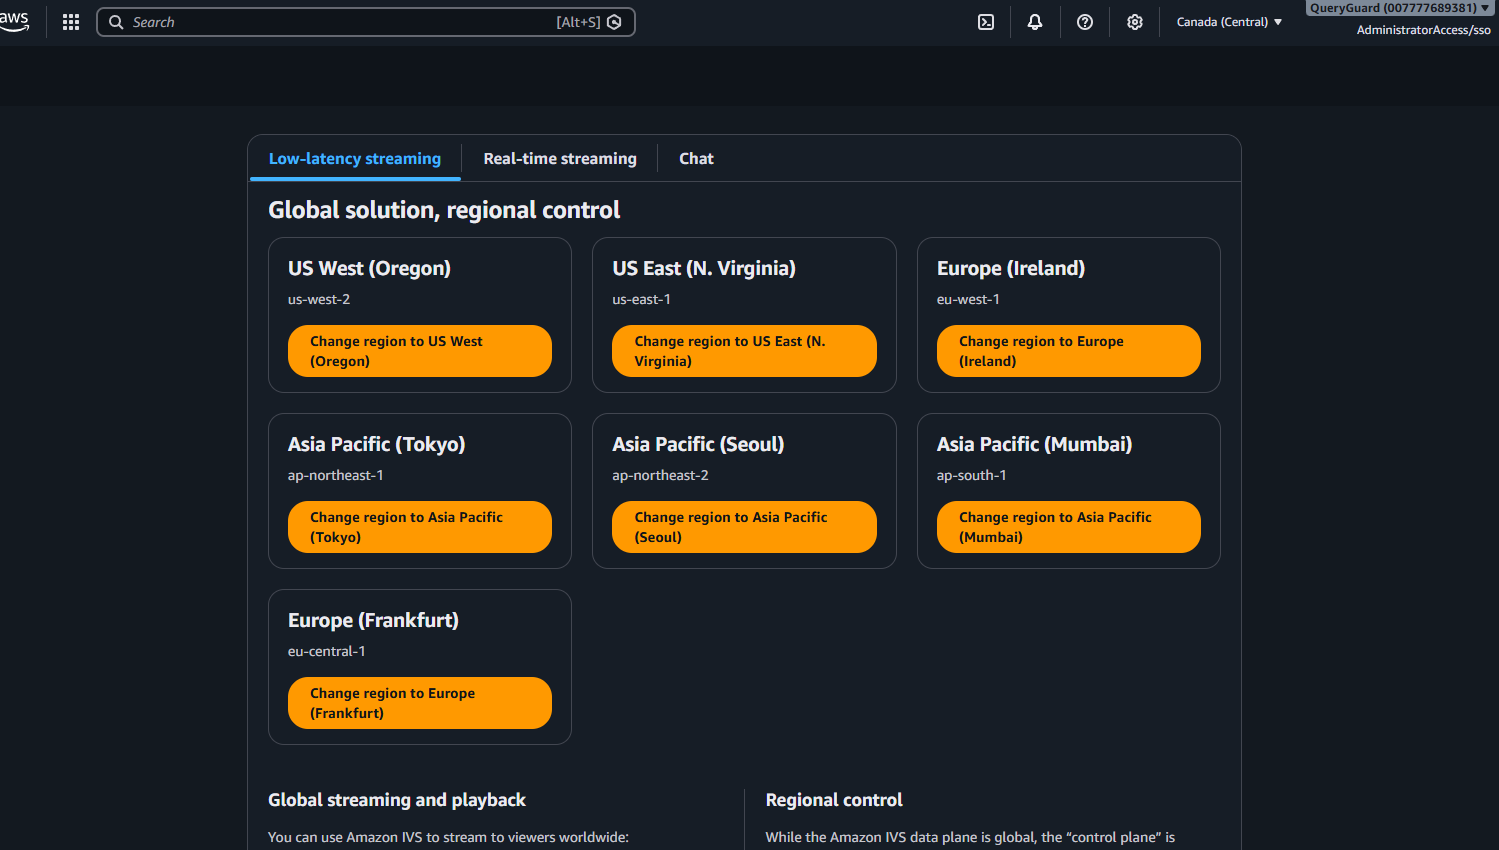
One design detail worth knowing: IVS is a global service with regional control. Delivery to viewers is worldwide, but you create and manage the channel in a specific region.
Getting started is a single button, AWS even estimates it at 1–2 minutes:
Expand your knowledge with Deploy Jenkins on Amazon EKS: A Practical Tutorial
Latency, throughput, and scale
- Latency (Low-latency streaming): glass-to-glass latency is usually under 5 seconds, and can be under 3, fine for watch-live with light interaction (chat, reactions).
- Latency (Real-time streaming): if you need true two-way, IVS Real-time uses WebRTC for under ~300 milliseconds.
- Throughput / input: you can ingest up to 1080p video; keep your input within IVS’s recommended limits (around 8.5 Mbps max) with a 2-second keyframe interval for clean transcoding.
- Scale (output): delivery runs on a global CDN, so one channel fans out to very large concurrent audiences with nothing to provision, that’s the point of a managed service.
Where it’s available (regions)
IVS is a global service with a regional control plane: delivery to viewers is worldwide, but you create and manage channels in one of these regions:
Explore this further in Sed for JSON: Emergency Patterns When jq Is Unavailable
- US East (N. Virginia)
us-east-1 - US West (Oregon)
us-west-2 - Europe (Ireland)
eu-west-1 - Europe (Frankfurt)
eu-central-1 - Asia Pacific (Tokyo)
ap-northeast-1 - Asia Pacific (Seoul)
ap-northeast-2 - Asia Pacific (Mumbai)
ap-south-1
IVS isn’t in every region, notably not in Canada (Central). My console was set to Canada, so IVS offered to switch me to a supported region and my channel ended up in
us-east-1 (you can see it in the playback URL). The data plane is still global, so viewers anywhere get low latency no matter which control-plane region you pick.Creating the channel, what every setting means
This is the part that confused me the first time, so here’s each option decoded.
Default vs Custom configuration
- Default configuration — sensible defaults, optimized for live interactions. Pick this if you just want it to work.
- Custom configuration — lets you choose the channel type and latency yourself. I chose Custom so I could see (and explain) every knob.
Channel type, the one that drives quality and cost
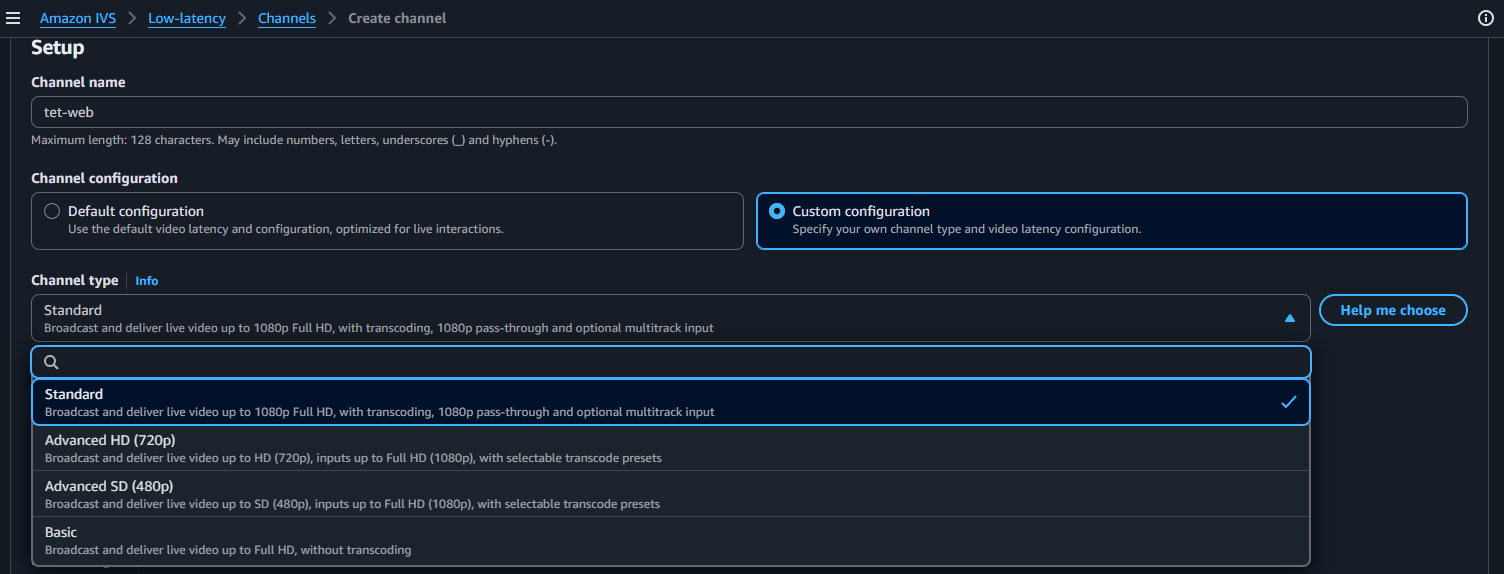
| Channel type | What it does | Trade-off |
|---|---|---|
| Standard | Up to 1080p, transcoding to multiple qualities (adaptive bitrate) | Best viewer experience on varied networks; most expensive |
| Advanced HD (720p) | Deliver up to 720p, inputs up to 1080p, selectable transcode presets | Cost-optimized transcoding |
| Advanced SD (480p) | Deliver up to 480p, selectable presets | Cheapest transcoding tier |
| Basic | Up to 1080p, no transcoding | Cheapest input; viewers get the single quality you send |
What to care about: transcoding = adaptive bitrate, IVS makes several quality versions so a viewer on a weak connection auto-drops to a lower resolution. Standard gives the best experience; Basic is cheapest but everyone gets exactly the stream you send (no auto-downgrade). For a test, Basic saves money; for a real product with viewers on mixed networks, Standard is worth it.
Video latency, playback auth, ingest, container format
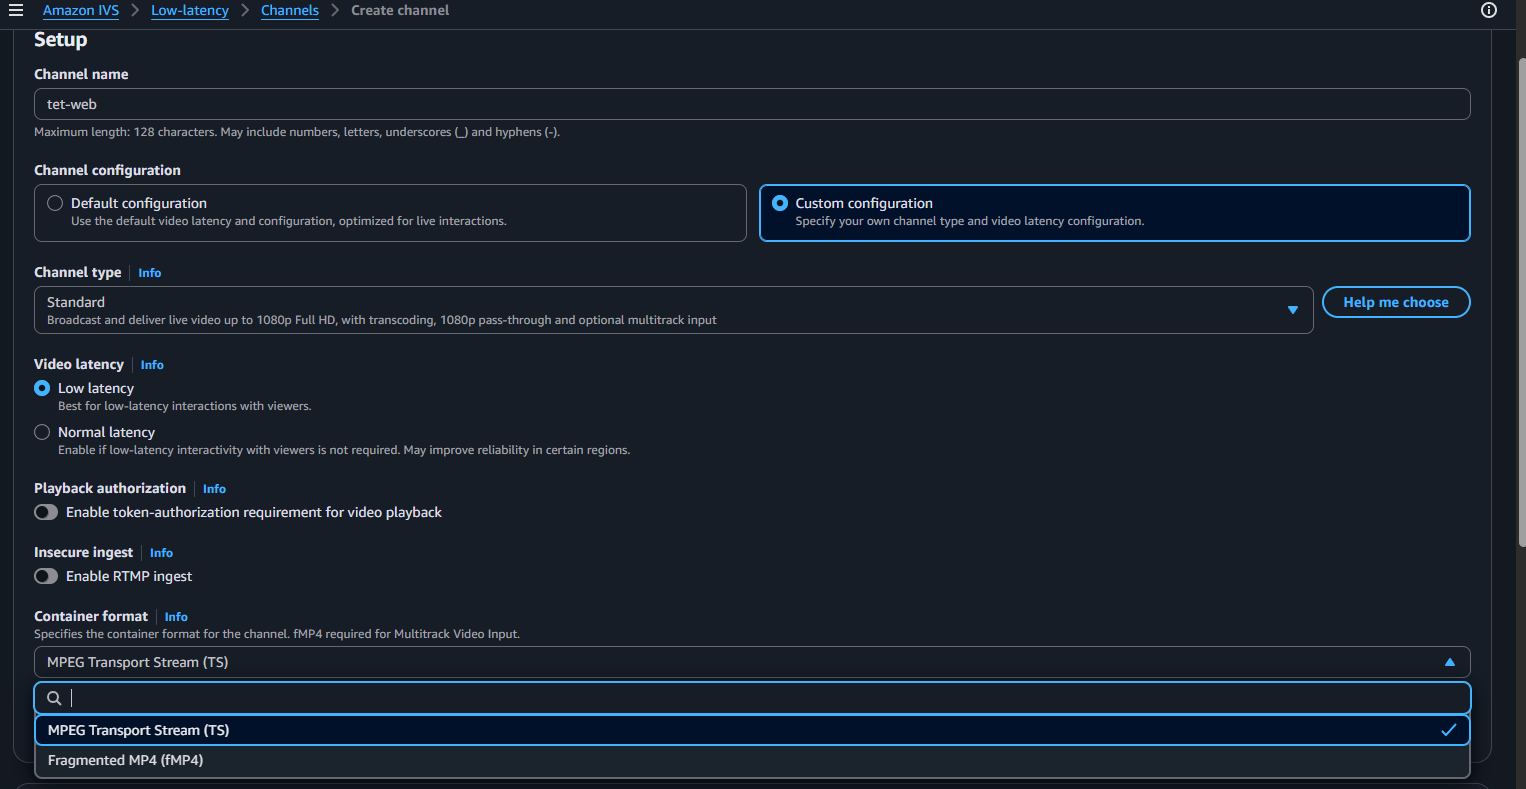
- Video latency — Low vs Normal. Low (a few seconds) is best when viewers interact with the broadcaster; Normal is higher delay but can be more reliable in some regions. For watch-live, choose Low.
- Playback authorization. Off = anyone with the playback URL can watch (what you want for a public/test stream). On = playback requires a signed token (private streams), more setup. I left it off.
- Insecure ingest (RTMP). Off means IVS only accepts RTMPS (encrypted). Keep it off and stream securely, every decent broadcaster (including Larix) supports RTMPS.
- Container format — MPEG-TS vs fMP4. Leave it on MPEG-TS. fMP4 is only needed for Multitrack Video Input (an advanced feature). Not relevant here.
Channel created
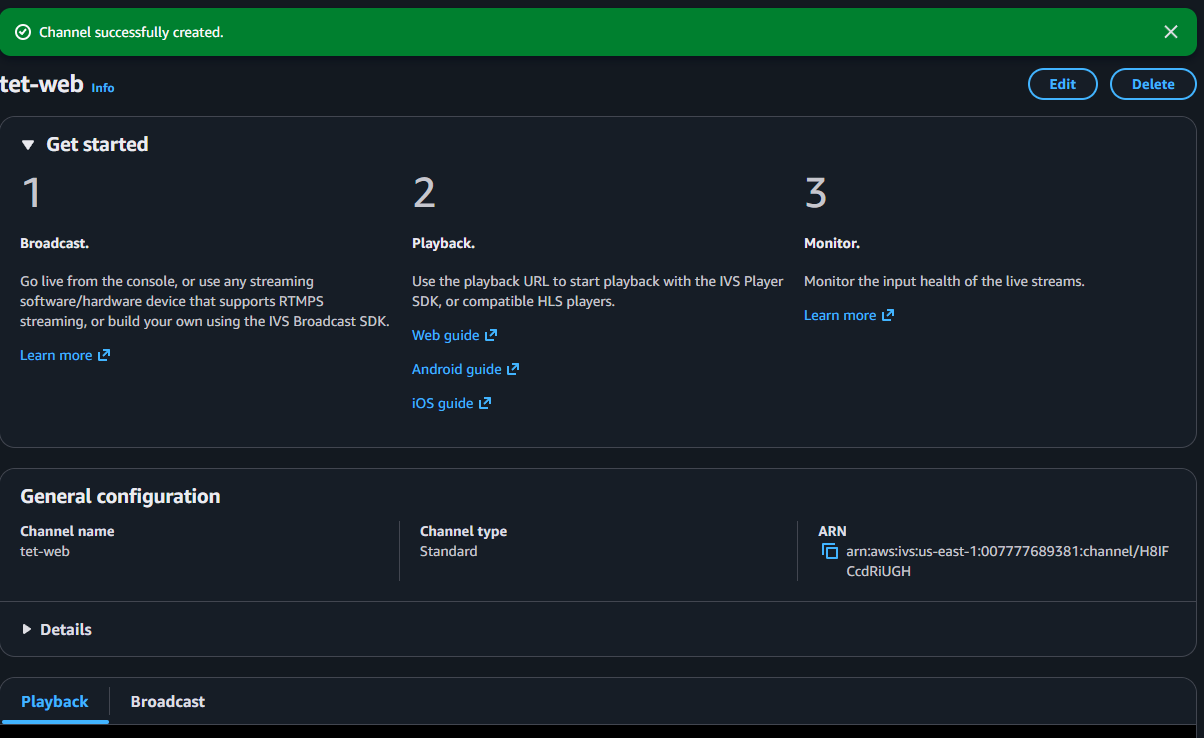
Click create and you get a success screen with a three-step “get started” (Broadcast → Playback → Monitor) and the channel’s ARN and type.
Discover related concepts in AWS Lambda Configuration Explained: What to Care About (and Why)
The three values you actually need
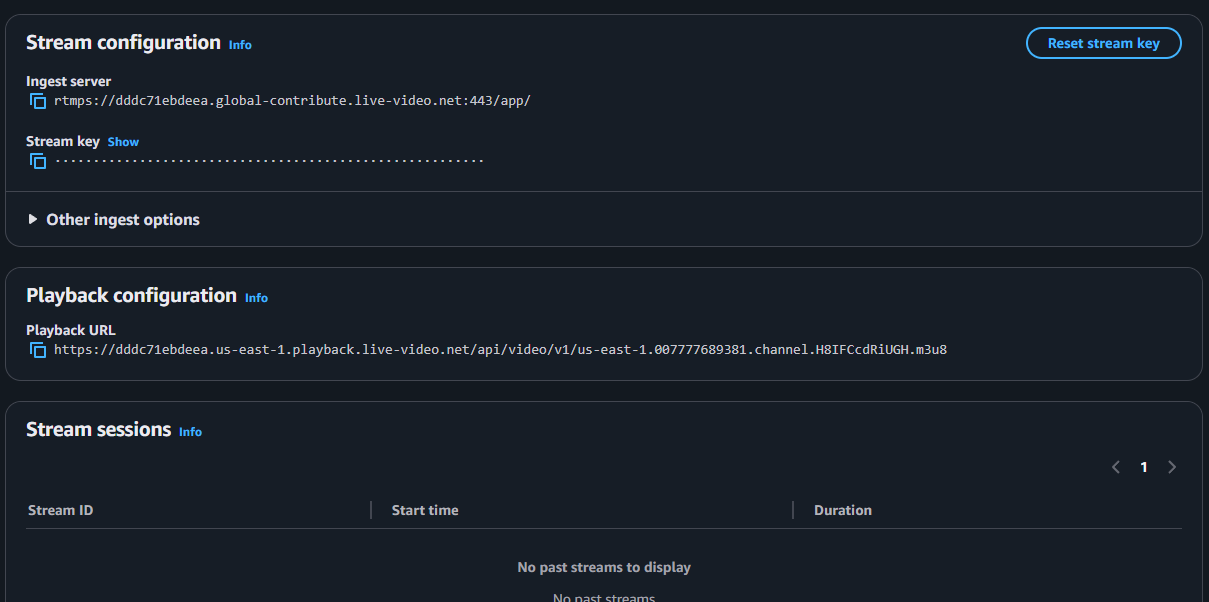
Scroll to Stream configuration and Playback configuration. Three things matter:
Uncover more details in Tuning AWS Lambda for Cost: The Memory Myth, Measured
- Ingest server — an
rtmps://...URL your phone pushes video to. - Stream key — your secret credential (click Show to reveal). Anyone with this can stream to your channel, keep it private.
- Playback URL — an
.m3u8(HLS) link viewers open to watch.
Broadcasting from your phone (the gotcha step)
Install a broadcaster app that supports RTMPS. I used Larix Broadcaster, but any of these work the same way, you just point them at the IVS ingest URL + stream key:
- Larix Broadcaster — free, iOS/Android (what I used)
- Streamlabs — mobile + desktop, popular and beginner-friendly
- Prism Live Studio — free mobile broadcaster
- OBS Studio — free desktop, the most popular streaming software (great from a laptop + webcam)
- Wirecast / vMix — professional desktop production tools
- FFmpeg — command-line, for scripted or automated streams
- IVS Broadcast SDK — build broadcasting into your own iOS/Android/web app (and no watermark)
Add a new connection in whichever you pick. Here’s the part that trips everyone up:
IVS does not use username/password RTMP auth. The stream key is your credential, and it goes on the end of the URL.
- Name: anything (e.g.
IVS) - URL: the ingest server with the stream key appended after
/app/:rtmps://<your-ingest>.global-contribute.live-video.net:443/app/YOUR_STREAM_KEY - RTMP authorization: None — leave username and password blank.
Save, then tap the red button to go live.
Journey deeper into this topic with Master tmux: From Multiplexer to a Go Session Manager
If you select an RTMP auth mode and enter a username/password, it will fail. Set auth to None and put the stream key in the URL. That one detail cost me a few confused minutes.
It’s live
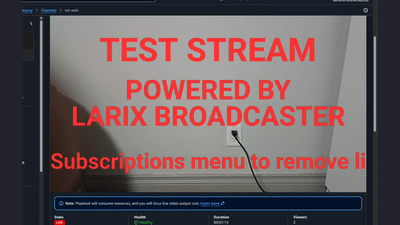
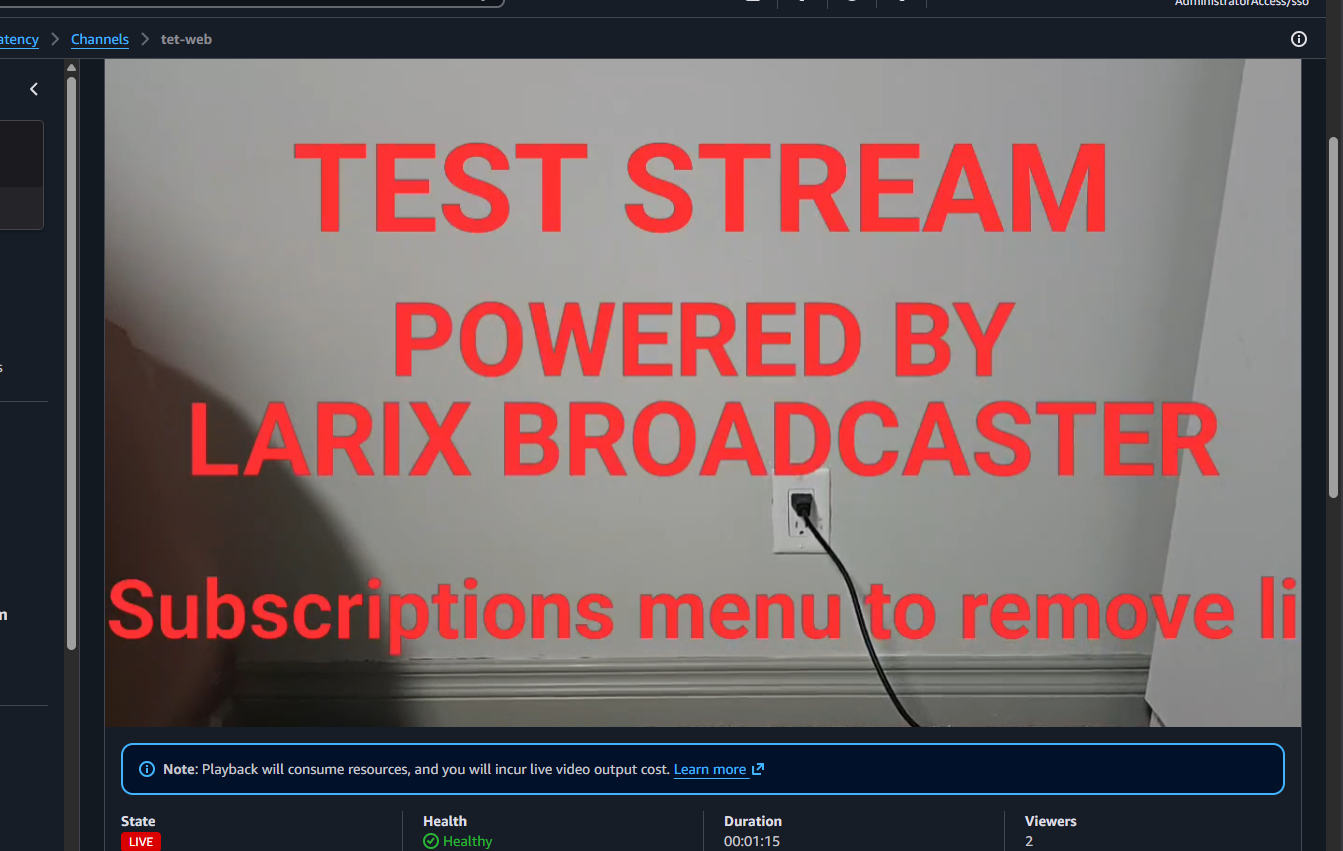
Back on the channel page, the built-in preview player shows the stream, State: LIVE, Health: Healthy, viewers counting, and audio coming through:
To watch on other devices, open the Playback URL:
Enrich your learning with CPU Monitoring: From Linux Commands to a Go Dashboard
- iPhone/Mac: paste it into Safari — it plays natively.
- Any device: VLC → Open Network Stream → paste the URL.
The gotchas I hit (so you don’t)
{"error":"Can not find channel"}when you open the playback URL = nothing is live yet. IVS only serves the URL while you’re actively streaming. Go live first.- Chrome/Brave can’t play a raw
.m3u8in the address bar, you’ll see manifest text or the error, even when live. Use Safari, VLC, or an IVS web player page instead. - The big “TEST STREAM / POWERED BY LARIX” overlay is the free Larix watermark, not IVS. Remove it with a Larix subscription or by broadcasting from your own app via the IVS Broadcast SDK.
- Keep the stream key secret. The ingest and playback URLs are fine to share; the stream key is a credential.
What it costs (and how to not overpay)
IVS bills two things, and only while there’s activity:
- Input — an hourly rate while you’re broadcasting, set by channel type, flat with no volume tiers. Standard is $2.00/hour — the same in every Region. Advanced HD is $0.85, Advanced SD and Multitrack Full HD are $0.50, and Basic is $0.20. This is per stream, not per viewer.
- Output — an hourly rate per viewer (the console preview tab counts too), varying by resolution (HD > SD > audio-only) and the region it’s delivered from. Unlike input, output is tiered by monthly volume. In North America, HD output runs $0.072/viewer-hour for the first 10,000 hours a month, then $0.066, $0.060, $0.056, and $0.048 above 500,000.
Rough worked example — a 1-hour Standard stream watched by 10 HD viewers in North America:
$2.00 input + (10 × $0.072 output) = $2.00 + $0.72 = ~$2.72 for the hour.
Note the shape of that, because it is the thing worth internalising: input is flat per stream, output scales with your audience. Divide one by the other and the crossover is $2.00 ÷ $0.072 ≈ 28 concurrent HD viewers — below that the broadcast itself dominates your bill, above it the audience does. Which side of 28 you expect to live on decides whether channel type or output resolution is the lever worth pulling.
Keep it cheap:
- Stop the broadcast when done (ends input cost).
- Close the preview tab and viewer devices (ends per-viewer output cost).
- Use Basic for testing; Advanced SD/HD or Multitrack to cut transcoding cost in production.
An idle channel that isn’t streaming or being watched costs nothing, but tidy up when finished.
Master this concept through Tuning AWS Lambda for Cost: The Memory Myth, Measured
Which IVS mode should you use?
- Broadcasting to an audience (one-to-many) → IVS Low-latency streaming (what we did).
- Interactive / two-way (guests joining, video calls, live shopping) → IVS Real-time streaming (WebRTC, sub-second).
IVS vs Kinesis Video Streams: which service?
IVS isn’t AWS’s only video service, and the one it’s most often confused with is Kinesis Video Streams (KVS). Picking wrong is a classic mistake. The simplest framing:
IVS = broadcast video to people. KVS = ingest video from devices for storage and machine learning.
| Need | Use |
|---|---|
| Broadcast live to an audience, low latency, big scale | IVS Low-latency |
| Sub-second two-way / interactive | IVS Real-time or KVS WebRTC |
| Ingest camera/IoT video for durable recording / retention | Kinesis Video Streams |
| Run computer vision (motion/person detection) on the feed | KVS + Rekognition Video |
| Security cameras / 24-7 surveillance | Kinesis Video Streams |
| A creator or app streaming live to viewers | IVS |
Ask yourself (the senior version):
- Who or what consumes the video — humans watching a broadcast (→ IVS), or software/ML processing it (→ KVS)?
- Do I need to store it for hours, days, or years? → KVS (IVS is not a recorder).
- Do I need computer vision on the stream? → KVS + Rekognition.
- Do I need huge concurrent audiences at low latency? → IVS.
- Is it a camera/sensor feeding video for later review (security, monitoring)? → KVS.
If you’re building “let users go live to an audience,” it’s IVS (this article). If you’re building “cameras that record and get analysed,” it’s KVS — a different pipeline, and a good topic for its own piece.
Deepen your understanding in Why YouTube-Scale Systems Need SQS: Architecture Notes
Wrapping up
From nothing to a live phone stream watched on other devices took about fifteen minutes and zero code: create an IVS channel, understand the handful of settings (Standard vs Basic is the one that matters for cost/quality; keep ingest secure, playback public for a test), append your stream key to the RTMPS URL in Larix, and watch via the playback URL in Safari or VLC. Managed streaming really is the easy path, the only hard parts are the two or three gotchas above, and now you have those too.
Deepen your understanding in Why YouTube-Scale Systems Need SQS: Architecture Notes
References and Further Reading
- Amazon Web Services. Amazon IVS Low-Latency Streaming User Guide.
- Amazon Web Services. IVS channel types.
- Amazon Web Services. Setting up for streaming (ingest).
- Amazon Web Services. Amazon IVS pricing.
Question
Would you reach for IVS for a side project's live video, or roll your own with an RTMP server, and why?
Similar Articles
Related Content
More from cloud
Cut AWS Lambda cost: what you are actually billed for, why more memory is rarely cheaper, the exact …
How I turned a Hugo blog into a public MCP server on Netlify — tools, resources and prompts over a …
You Might Also Like
Design an AWS Lambda system for a million users an hour: capacity math, concurrency, cold starts, …
Mount an S3 bucket on EC2 with Amazon S3 Files, end to end: the setup, latency against EBS and EFS, …
Knowledge Quiz
Test your general knowledge with this quick quiz!
A set of multiple-choice questions to test your knowledge.
Take as much time as you need.
Your score will be shown at the end.
Question 1 of 5
Score: 0
Quiz Complete!
Your score: 0 out of 5
Loading next question...
Contents